
Generating Images Through Stable Diffusion in Sanity Studio
October 6, 2022
4 min


Stable Diffusion has been one of the hottest topics lately, and deservedly so; the ability to generate such detailed images (including this article's banner image) given only a text prompt is revolutionary. While this technology has many applications, this article will be focusing specifically on integrating Stable Diffusion into Sanity and Studio.
Many content-driven websites today leverage some sort of digital content management platforms to manage a variety of content. Sanity provides exactly that; a highly versatile platform where content creators can collaborate in real time to develop and ship content. Stable Diffusion can become an invaluable tool for content creators looking to incorporate image assets into their content.
This article will provide details on how to leverage Stable Diffusion to generate images from text prompts within Studio. To achieve this, we will need:
- Basic prior knowledge on using Sanity's basic schema types and custom components
- Basic knowledge of Python
- A local machine running Windows, meeting the minimum requirements found in the stable-diffusion-webui Github repository (most notably, a minimum of 4GBs of GPU VRAM)
- A stable internet connection
We will first look to create a local web-server to handle requests for generating images. The Stable Diffusion functionality is handled within the stable-diffusion-webui repository. More specifically, we will be relying on its txt2img mode, which generates an image when given a text prompt. To handle such API requests, clone the fork of the repository named stable-diffusion-webui-api (which itself is a fork from another fork, with some minor changes/fixes). The fork adds an API mode which implements a web-server created using the FastAPI web framework and uvicorn web-server implementation. The web-server handles the pre-flight requests, CORS settings, and exposes an endpoint v1/txt2img.
1# /modules/api.py
2import uvicorn
3from fastapi import FastAPI, Body, APIRouter
4from fastapi.middleware.cors import CORSMiddleware
5
6...
7
8app = FastAPI()
9app.add_middleware(
10  CORSMiddleware,
11  allow_origins=["*"],
12  allow_credentials=True,
13  allow_methods=["*"],
14  allow-headers=["*"]
15)
16
17...
18
19class API:
20  def __init__(self, txt2img, ...):
21    ...
22    self.router = APIRouter()
23    app.add_api_route("v1/txt2img", self.txt2imgendoint, response_model=TextToImageResponse, methods=["GET", "POST"])
24 ...After cloning the repository onto your local machine, download the Stable Diffusion model and add it as model.ckpt to the models folder. We can now execute the file webui-user.bat to start the server locally. At this point, we should be able to hit the exposed endpoint v1/txt2img through localhost on the port that the server is running on. We may do so by crafting a POST request that includes a body with a json object of the shape:
1{
2  "txt2imgreq": {
3    "prompt": "magical elven village",
4    "negative_prompt": "",
5    "prompt_style": "None",
6    "prompt_style2": "None",
7    "steps": 20,
8    "sampler_index": 0,
9    "restore_faces": false,
10    "tiling": false,
11    "n_iter": 1,
12    "batch_size": 1,
13    "cfg_scale": 7,
14    "seed": -1,
15    "subseed": -1,
16    "subseed_strength": 0,
17    "seed_resize_from_h": 0,
18    "seed_resize_from_w": 0,
19    "height": 512,
20    "width": 512,
21    "enable_hr": false,
22    "scale_latent": true,
23    "denoising_strength": 0.7
24  }
25}The field prompt will be our input text prompt that our generated image will be based on. The response will be a json object of the shape:
1{
2    "images": [
3      "_placeholder_"
4    ],
5    "all_prompts": [
6        "magical elven village"
7    ],
8    "negative_prompt": "",
9    "seed": 3385655462,
10    "all_seeds": [
11        3385655462
12    ],
13    "subseed": 2253025863,
14    "all_subseeds": [
15        2253025863
16    ],
17    "subseed_strength": 0.0,
18    "width": 512,
19    "height": 512,
20    "sampler_index": 0,
21    "sampler": "Euler a",
22    "cfg_scale": 7.0,
23    "steps": 20,
24    "batch_size": 1,
25    "restore_faces": false,
26    "face_restoration_model": null,
27    "sd_model_hash": "7460a6fa",
28    "seed_resize_from_w": 0,
29    "seed_resize_from_h": 0,
30    "denoising_strength": null,
31    "extra_generation_params": {},
32    "index_of_first_image": 0,
33    "html": "<p>magical elven village<br>\nSteps: 20, Sampler: Euler a, CFG scale: 7.0, Seed: 3385655462, Size: 512x512</p>"
34}A useful bit of information to keep note of before moving on: the images field is an array of base64 encoded strings.
Moving on to Sanity, we will now look to create a custom component that will hit this endpoint and store the result into Content Lake. Create a new Sanity project, and add a document schema:
1import StableDiffusion from '../src/StableDiffusion';
2
3export default {
4  name: 'example',
5  type: 'document',
6  title: 'Example',
7  fields: [
8    {
9      name: 'prompt',
10      type: 'string',
11      title: 'Prompt',
12    },
13    {
14      name: 'image',
15      type: 'text',
16      title: 'Image',
17      inputComponent: StableDiffusion,
18      hidden: ({ document }) => !document.title,
19    },
20  ],
21};The above schema includes a string field prompt that we will pass to our API later. There is also a field named image - represented by our custom input component - of type text to store a base64 encoded image. The custom input component will look similar to the example detailed in another article for creating custom components:
1import React, { useState, useEffect } from 'react';
2import { withDocument } from 'part:@sanity/form-builder';
3import sanityClient from 'part:@sanity/base/client';
4import { useDocumentOperation } from '@sanity/react-hooks';
5
6const StableDiffusionComponent = React.forwardRef((props, ref, ...rest) => {
7  const client = sanityClient.withConfig({ apiVersion: '2021-06-07' });
8
9  const { _id, prompt } = props.document;
10  // `_id` must be a non-empty string
11  const testId = _id ? _id.replace('drafts.', '') : 'placeholder';
12
13  const { patch } = useDocumentOperation(testId, 'example');
14  const [image, setImage] = useState('');
15
16  const runStableDiffusion = async () => {
17    const body = {
18      txt2imgreq: {
19        prompt,
20        negative_prompt: '',
21        prompt_style: 'None',
22        prompt_style2: 'None',
23        steps: 20,
24        sampler_index: 0,
25        restore_faces: false,
26        tiling: false,
27        n_iter: 1,
28        batch_size: 1,
29        cfg_scale: 7,
30        seed: -1,
31        subseed: -1,
32        subseed_strength: 0,
33        seed_resize_from_h: 0,
34        seed_resize_from_w: 0,
35        height: 512,
36        width: 512,
37        enable_hr: false,
38        scale_latent: true,
39        denoising_strength: 0.7,
40      },
41    };
42    const headers = new Headers();
43    headers.append('Content-Type', 'application/json');
44    const options = {
45      method: 'POST',
46      body: JSON.stringify(body),
47      headers: headers,
48    };
49    // request to our local Python web-server to generate an image
50    const sdRes = await fetch(
51      `http://localhost:7861/v1/txt2img`,
52      options
53    );
54
55    if (sdRes.ok) {
56      // set the document's image field with the base64 encoded image
57      const res = await sdRes.json();
58      const { images } = res;
59      const newImage = images[0];
60      if (newImage && props.document?._id != 'placeholder') {
61        const newImageValue = `data:image/png;base64,${newImage}`;
62        setImage(newImageValue);
63        patch.execute([
64          {
65            set: {
66              image: newImageValue,
67            },
68          },
69        ]);
70      }
71    }
72  };
73
74  // sets image on component mount and change
75  useEffect(() => {
76    if (props.value) {
77      setImage(props.value);
78    }
79  }, [props.value]);
80
81  return (
82    <div>
83      <div
84        style={{
85          width: '100%',
86          height: '20rem',
87          backgroundColor: 'lightgray',
88        }}
89      >
90        <div
91          style={{
92            position: 'relative',
93            display: 'flex',
94            height: '100%',
95            width: '100%',
96            maxHeight: '100%',
97            maxWidth: '100%',
98            justifyContent: 'center',
99          }}
100        >
101          {image && (
102            <img
103              src={image}
104              alt="alt"
105              style={{
106                position: 'absolute',
107                objectFit: 'contain',
108                width: '100%',
109                height: '100%',
110              }}
111            />
112          )}
113        </div>
114      </div>
115      <button onClick={() => runStableDiffusion()}>
116        Run Stable Diffusion
117      </button>
118    </div>
119  );
120});
121
122export default withDocument(StableDiffusionComponent);
123The custom component is wrapped with a HoC withDocument that exposes the encompassing document to our component, enabling us to sample the prompt field to pass into our API request. The base64 encoded image is saved to the image field. After adding the schema to schema.js, starting a local instance of Studio should allow us to leverage Stable Diffusion within Sanity!
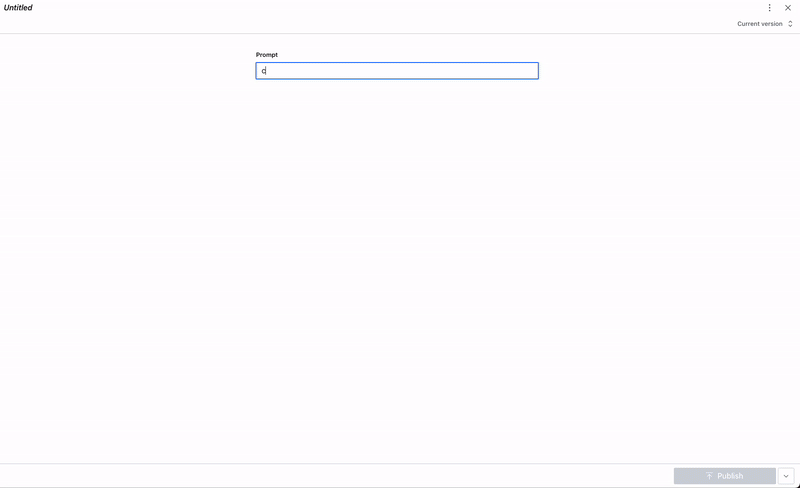
Stable diffusion prompt and image generation
The next step would be to have this functionality available on a deployed instance of Studio; after all, Sanity is meant to be used as a collaborative platform. We can achieve this through HTTP tunnelling, and the tool that we will be using to do this is a ngrok Secure Tunnel. Follow the steps over at the ngrok dashboard, which will go over the setup and starting a tunnel in three steps. The resulting command prompt should look like:
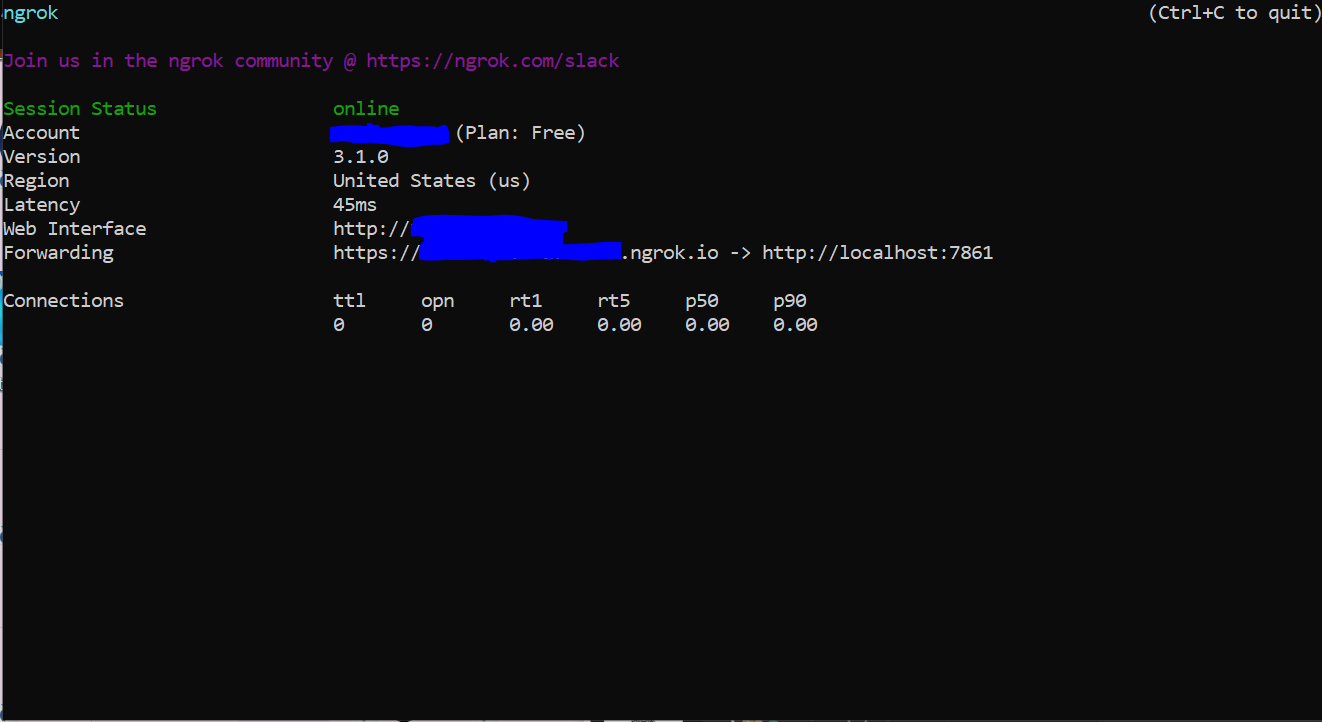
ngrok tunneling
Note that the tunnel should be forwarded to the port that your Python web-server is running on.
The last step is to simply replace the domain we make our request to in Studio to the public domain shown above.
1import React, { useState, useEffect } from 'react';
2import { withDocument } from 'part:@sanity/form-builder';
3import sanityClient from 'part:@sanity/base/client';
4import { useDocumentOperation } from '@sanity/react-hooks';
5
6const StableDiffusionComponent = React.forwardRef((props, ref, ...rest) => {
7  ...
8  const runStableDiffusion = async () => {
9    // request to our local Python web-server to generate an image
10    const sdRes = await fetch(
11      `https://{YOUR_PUBLIC_DOMAIN}/v1/txt2img`,
12      options
13    );
14  };
15
16  ...
17
18  return (
19    ...
20  )
21});
22
23export default withDocument(StableDiffusionComponent);
24Stable Diffusion text-to-image generation should now work on deployed instances of Studio!


